Use the WordPress Gutenberg Editor to Make Your Pages Exciting
Since WordPress 5, the Gutenberg editor has been the default editor for editing posts and pages. The goal of the new editor is to give users more of a visual approach to editing content. If you don’t like the new editor, you can install the Classic Editor plugin. With the Classic Editor settings, you can make both editors available or only use the Classic Editor. For quite a while, I resisted using the Gutenberg editor and then decided to take some time to learn it. It seems to be easier to write in it because there are fewer distractions. Some things like uploading images take less steps to accomplish. I would urge you to try out the Gutenberg editor in WordPress for a while.
Blocks Basics
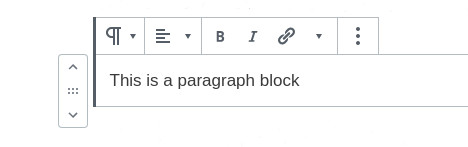
Content is added to the document using blocks. What you are reading now is a Paragraph block which is the most basic block of all and probably the one you will use the most. The paragraph block has controls on the left side that allow you to move the block up or down in the document. The up arrow moves the block up above the next higher block and the down arrow moves the block down below the block below. The object with the 6 dots allows you to click and drag the block where you want it. Once you create a block, it can be changed to a different block by hovering the mouse over the block and clicking in the upper left-hand corner and selecting the new type of block.
Want to create a new paragraph block? Just hit enter at the end of a paragraph and the editor creates a new block. If you want to create a new line in the same paragraph block? Use shift-enter.
The blocks available to you will depend on the plugins that are installed and the theme you are using. For instance, if you have the WP Forms plugin installed, you will see that in the widgets section of the block tool.
The 3 vertical dots on the right side of the block tool bar give you some additional tools. Here you can delete a block, switch to HTML mode to edit the code in that block and create reusable blocks. If you find you are recreating the same kind of block or group of blocks, you can create a reusable block, this will show up in the list of blocks when you add a new block.
The Insertion Tool
Hover the mouse over the space between blocks and you will see a plus sign. Click on the plus sign to select and insert a new block at that point.
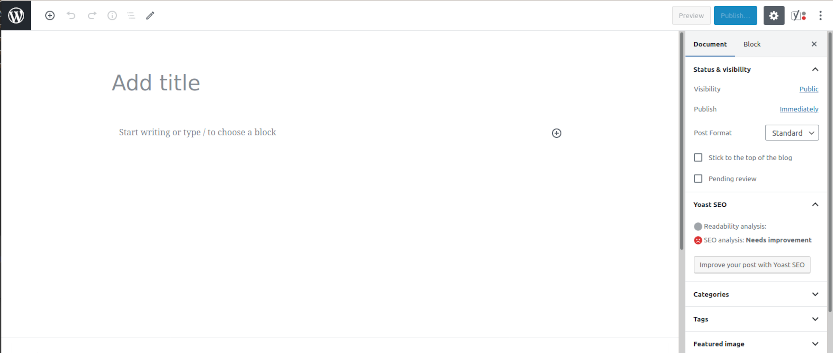
The Sidebar Tool
The sidebar tool has more information about the block that is not available in the block itself. Select the block and then select the block tab in the sidebar to see the additional settings available. Selecting the document tab allows you to set options for the whole document.
This is a Heading Block
Heading blocks are used to break your document into smaller digestible ideas. They also give search engines hints as to what is important in the document; H1 is usually more important than an H2 heading.
Image blocks – Is an Image Really Worth a Thousand Words?
Placing images and media is the primary focus of the new editor. Adding captions and aligning the image is easier and seems more intuitive.
One thing that may not be obvious is if you want to wrap text around an image, select the image block, and then select a size that will allow the text to flow around the image. Select either left or right alignment. Now place a paragraph block below the image and start writing. The text should start flowing around the image. If you don’t want the text to flow around the image and just want 2 columns, you can select the “Media and Text” tool which is in the layout elements section in the block selector tool. This will create 2 columns; one for the text and one for the image or video. The text will not wrap as it does in this block. Sometimes it takes a bit of fiddling around with the different block types to get the look you want.
So give the Gutenberg editor a try and you may discover things WordPress has built in to add style to your posts and pages.